Leverage Staking with Burrow — User Guide
Now Earn 50%+ Yields with your #NearX by Leverage Staking on Burrow.
Burrow is a non-custodial, autonomous money market.
It helps users unlock liquidity for interest-bearing assets such as NearX, etc.
Users can deposit NearX as collateral and borrow more NEAR to create a leveraged staking position, earning yields as high as 50% or more.
Here’s a Step-by-step guide to help you get started.
Step 1: Stake $NEAR with @stader__near & get $NearX
Refer the $NearX Staking Guide here
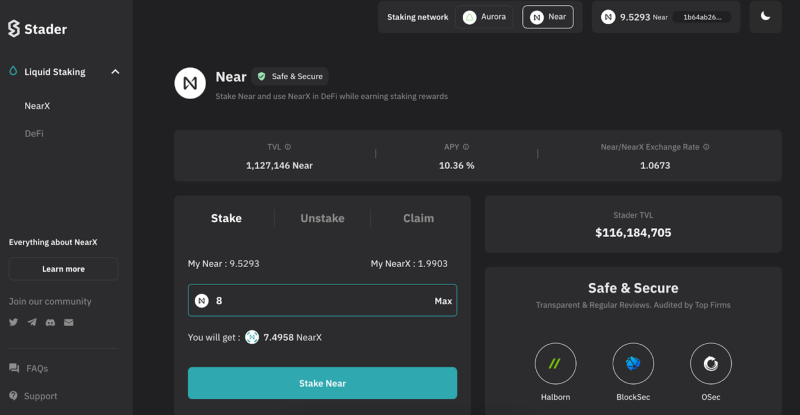
Step 2: To begin Lending, open the Stader-Near dApp.
Once there, check the Liquid Staking section on the left sidebar. Now click on ‘DeFi’.
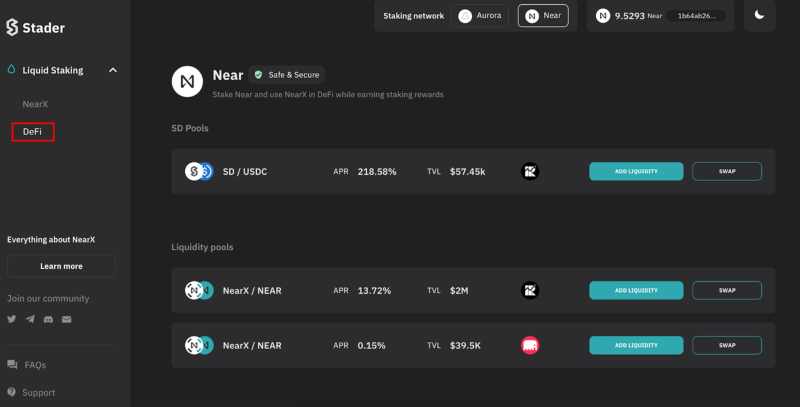
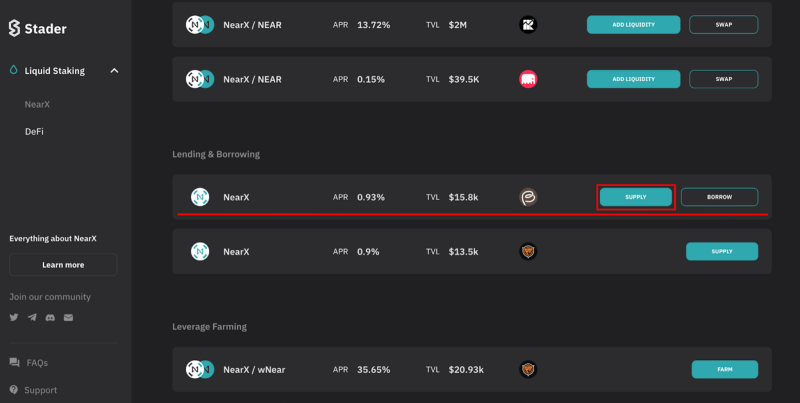
Step 3: When you click on DeFi, you’ll see the Lending and Borrowing section. Go to the NearX-Burrow option and click on “Supply”.
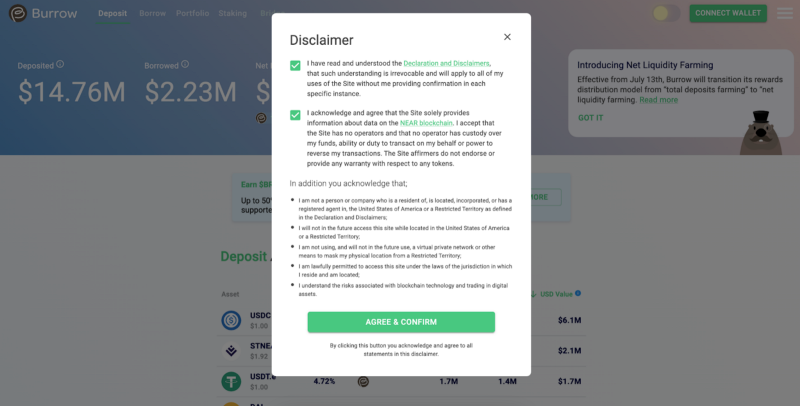
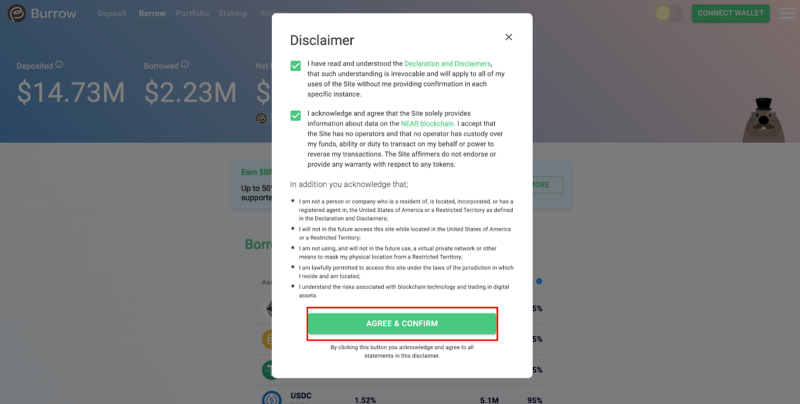
Step 4: When you click on Supply, you will be taken to the Burrow website. One the website, please read the terms and conditions. After you’ve read the terms, click on ‘Agree & Continue’.
Then connect your Wallet to Burrow.
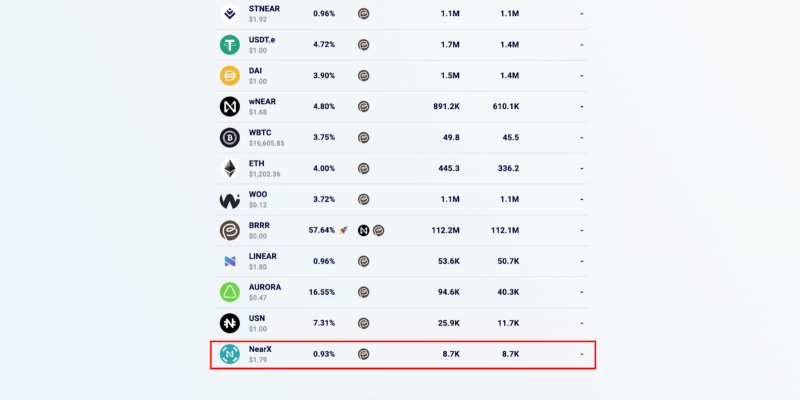
Step 5: Once you’ve connected your wallet, select NearX from the available options.
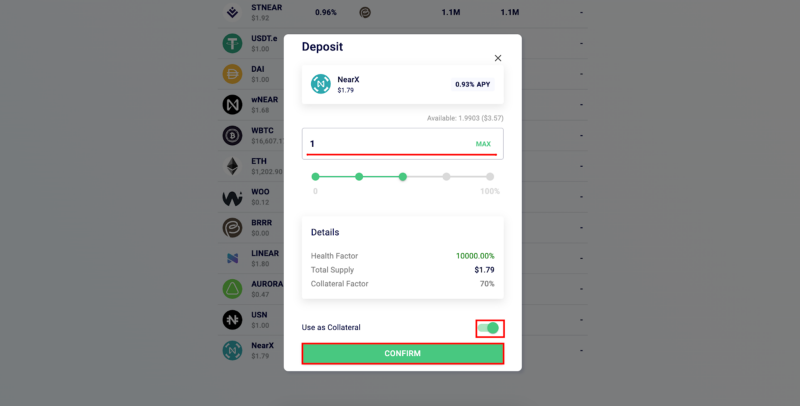
Step 6: Now enter the amount of NearX you wish to deposit. Then click on ‘Confirm’.
Please Note: You can use this deposit as a collateral later. For that you can use the toggle option given below.
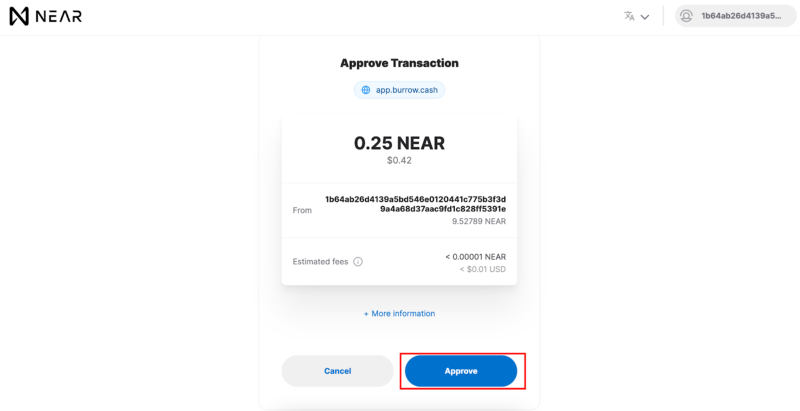
Step 7: Once you have entered the amount, click on ‘Approve’ to approve the transaction on your Near Wallet.
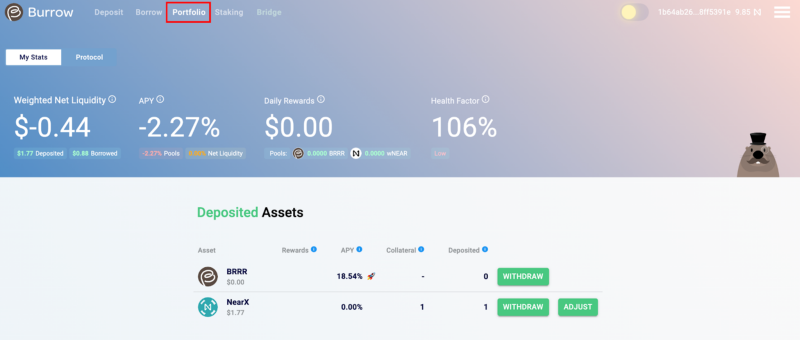
Step 8: That’s it. You’re Done.
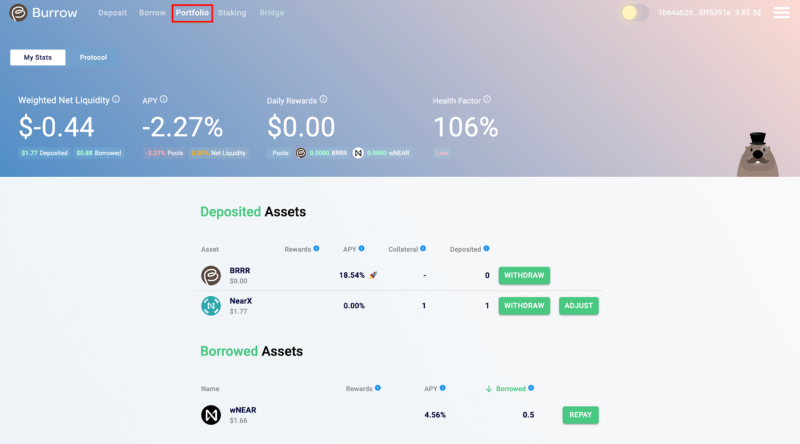
You can now check your deposits in the “Portfolio” tab.
Step 9: Now that you’re done with Lending, here’s how you can borrow wNear on Burrow using your deposited NearX as collateral.
Click on ‘Borrow’ from the menu on the top left. Then connect your wallet.
Note — You will need to read and accept the terms and conditions.
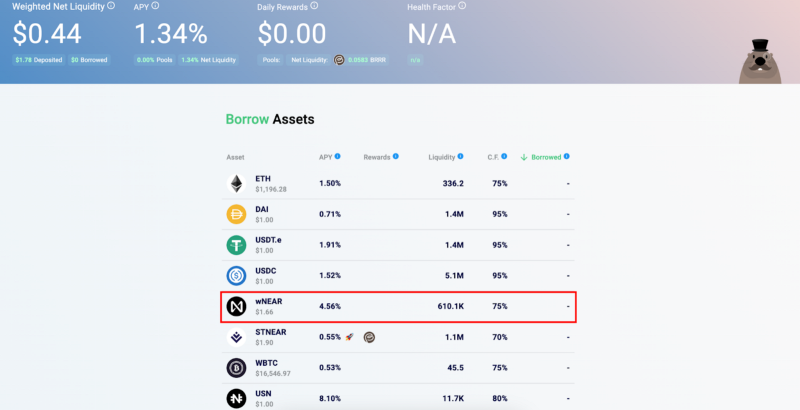
Step 10: Now select wNear from the given options.
Step 11: Now enter the amount of wNear you wish to borrow and click on ’Confirm’.
Note: On Burrow, all positions are collateralised. The risk of a position can be understood through the Health Factor.
Read more here
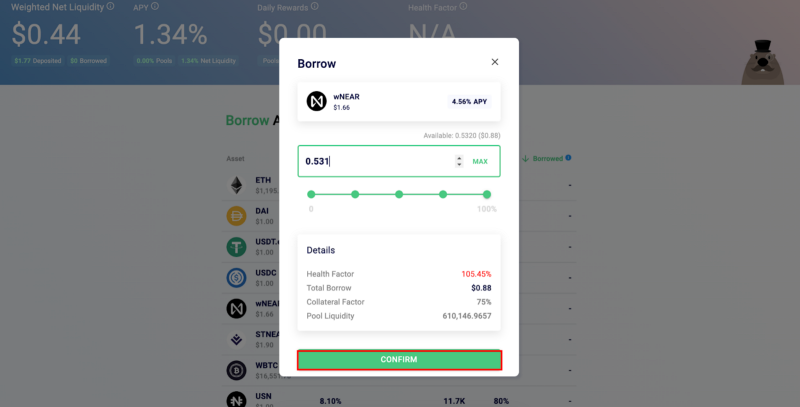
Step 12: Once you’ve entered the amount, click on ‘Approve’ to approve the transaction.

Step 13: Done! You’ve successfully borrowed assets. You can check your assets in the “Portfolio” tab.
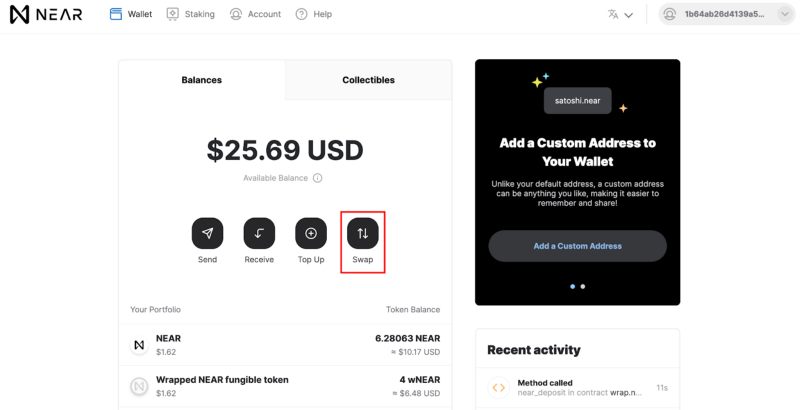
Step 14: Ok, now you’ve successfully completed lending and borrowing. But you can also swap your wNear for Near on the Near Web wallet or other swapping protocols
Go to your Near wallet and select Swap
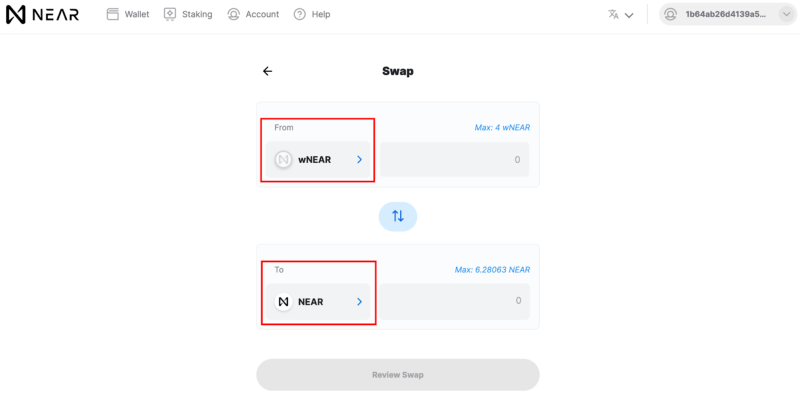
Step 15: Now in the ‘From’ section, select “wNear” & in the ‘To’ section, select Near
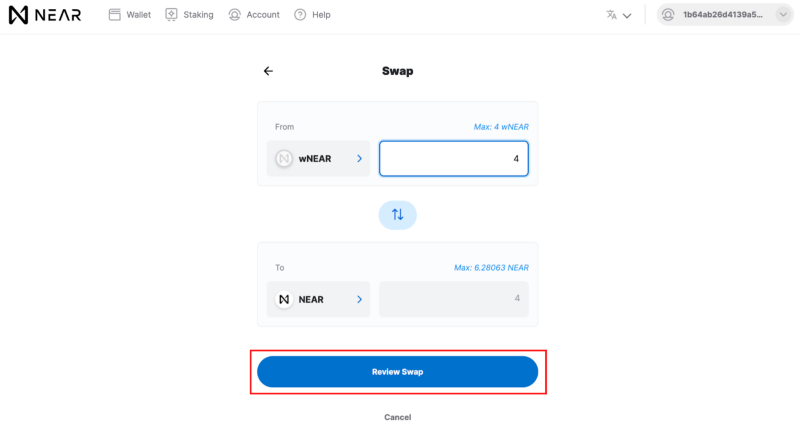
Step 16: Enter the amount of wNear you wish to swap and click on the “Review Swap”.
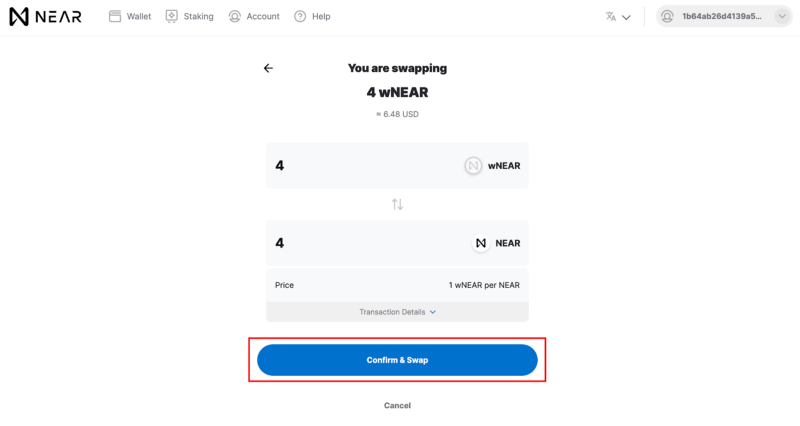
Step 17: Now all you need to do is click on ‘Confirm & Swap’.
And you’re done 🙂
Step 18: You can repeat steps 2 to 17 as many times as you want, based on your risk appetite.
You can finally close the loop by finishing at Stader Liquid staking.
Now you’re making yields upon yields, which can earn you as much as 50%+ on your staked assets.
That’s multi-fold benefits for a single investment.
Exciting, isn’t it?
Let’s get started here