Ledger Wallet User Guide for Stader Near
With the launch of NEAR Wallet Selector on Stader Near, we are live with Ledger Wallet.
With the launch of NEAR Wallet Selector on Stader Near, we are live with Ledger Wallet.
Ledger wallets are hardware wallets that safely store your crypto assets offline.
Read through to understand how to connect with Ledger. It can be done in 2 ways⬇️
Method 1: Connect with Ledger directly on the Near dApp
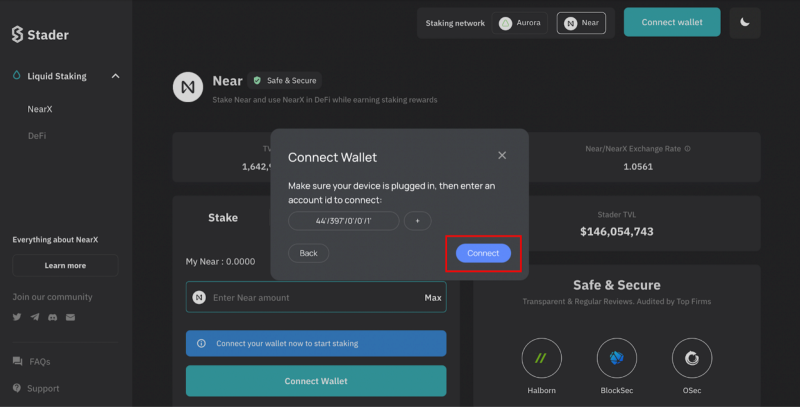
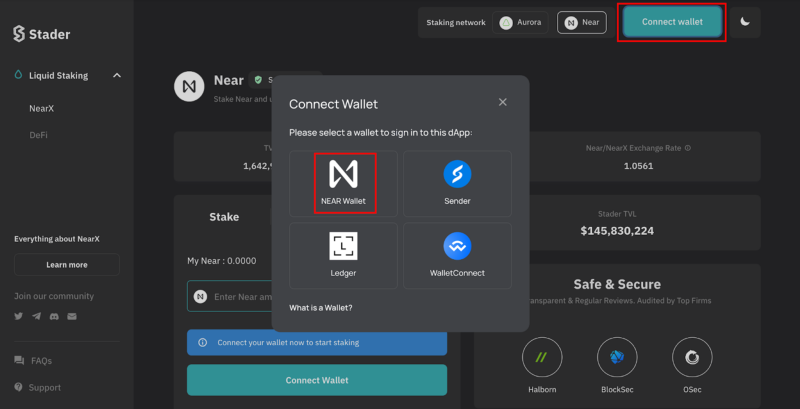
Step 1: Click on connect wallet & click on Ledger. Make sure your Ledger is connected to your laptop.
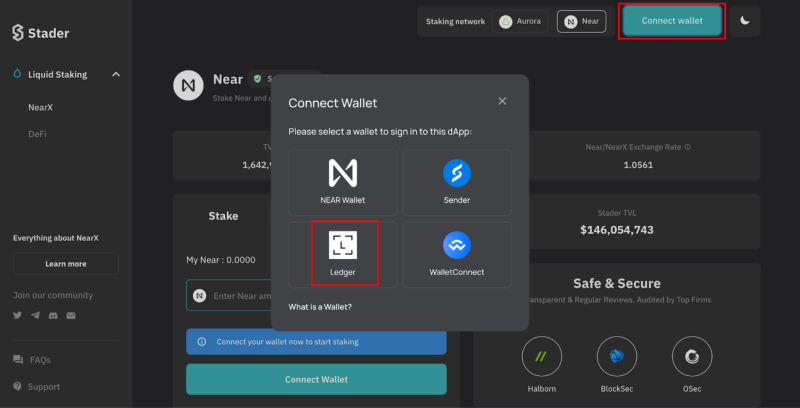
Step 2: Now you will see the HD path. By default it will pick the Near HD path. Click Connect to move to the next step.
Step 3: Click on your ledger device in the popup & click on connect.
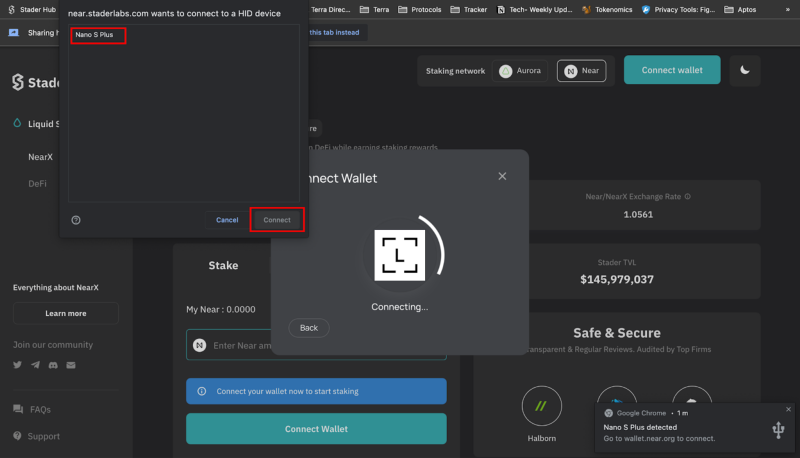
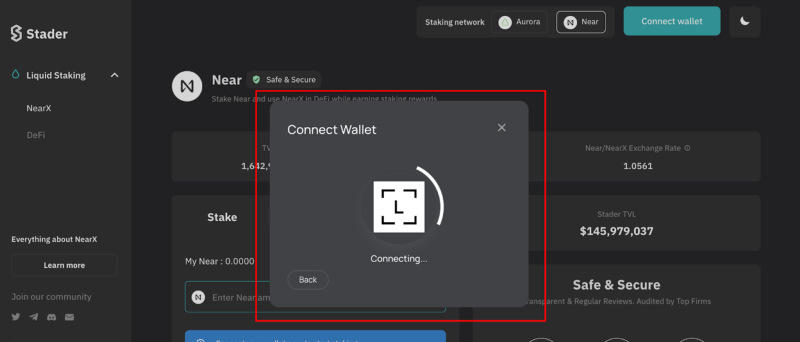
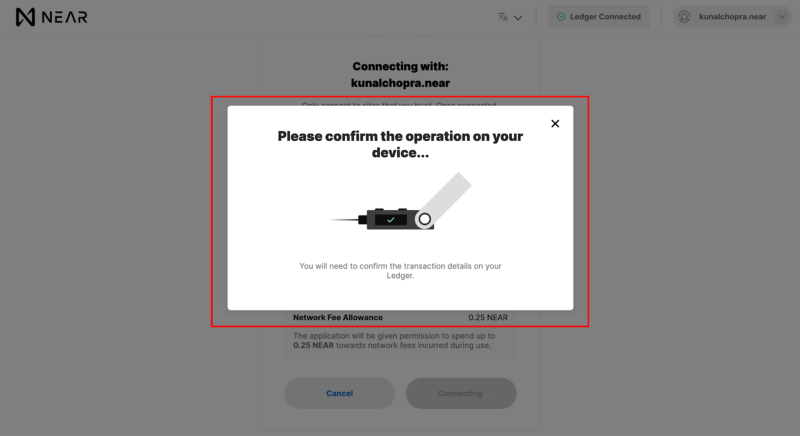
Step 4: The dapp will say connecting & you have to approve the transaction on the ledger to complete connecting with Ledger.
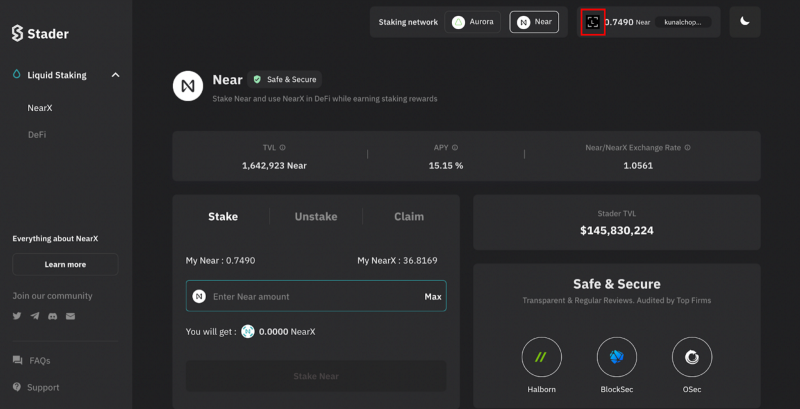
Once “Approved” the dapp will be connected with Ledger & you will be able to stake Near with Stader.
Method 2: Connect with Near Wallet using Ledger here
Step 1: Click on connect wallet & click on Near wallet.
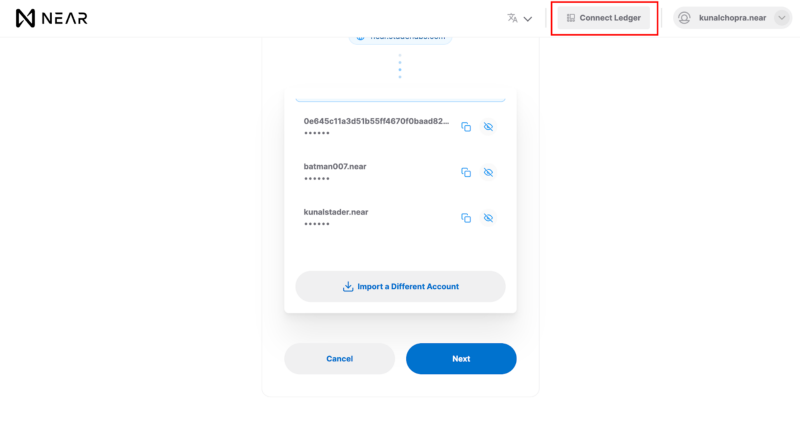
Step 2: You will be redirected to the Near wallet page. Select the wallet with keys on Ledger & Click on “Connect Ledger”
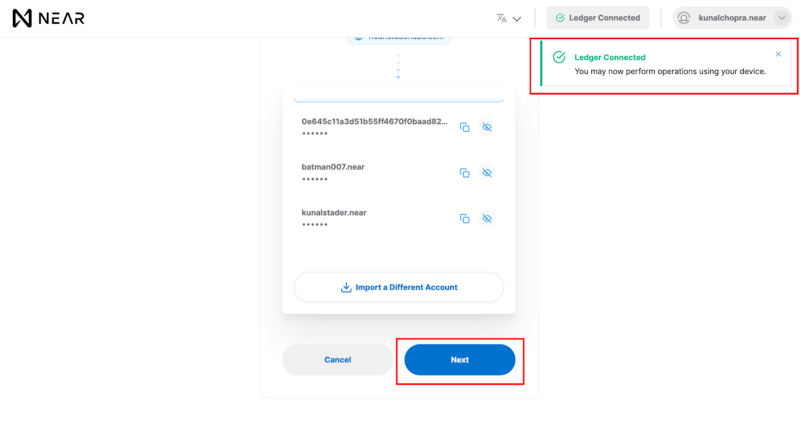
Step 3: Your Near wallet is connected with Ledger, now click on “Next” button to move ahead
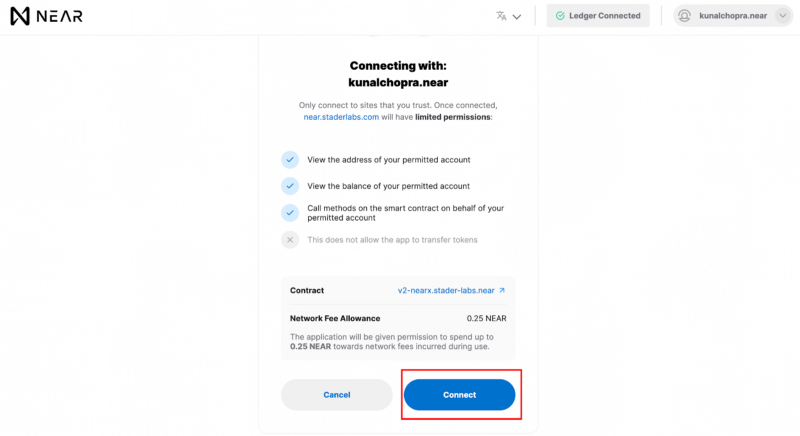
Step 4: Click on “Connect” CTA to connect wallet with Stader
Step 5: On clicking, you will get a popup to approve the transaction on your Ledger. Go to Approve & click both buttons to approve & your wallet will be connected with Stader Near.
Once connected, you will be able to stake Near with Stader.